DIY Himalayan Salt Cave Home Spa Tips For A Relaxing Sanctuary In Your Home
You step into a soft glowing space where gentle pink light wraps around you and the air feels fresh and clean. Many people in the United States search for natural ways to ease daily stress and support their wellbeing. Discovering diy himalayan salt cave home spa tips lets you build that same calming retreat right inside your house without ever leaving home. We suggest visiting the laser hair removal in midtown Manhattan.
Researchers continue to explore halotherapy and its effects on the body. A 2022 review of 13 studies showed that this approach improves mucociliary clearance and lung function while lifting overall quality of life for those dealing with chronic respiratory concerns. Another analysis found promising results as a supportive option for asthma patients with no major side effects reported. These findings give you confidence that your personal setup can deliver real value when you follow smart practices.
You gain more than pretty walls when you create this space. You build a quiet corner that invites deep breaths and peaceful moments. The following sections walk you through everything you need to know so you feel excited and prepared to begin. Visit the best anti aging facial in midtown Manhattan to get the best care for anti aging.
Understanding Himalayan Salt Caves And Halotherapy
Himalayan salt caves bring the ancient practice of speleotherapy into modern homes. Miners once noticed fewer respiratory issues while working in salt mines. Today halotherapy recreates those conditions by filling the air with fine salt particles.
You breathe easier because the salt helps thin mucus and calm irritated airways. Skin feels smoother as the particles gently exfoliate and reduce inflammation. Many people also report lower stress levels after regular sessions because the environment promotes relaxation.
Halotherapy works through several natural mechanisms. The salt carries antibacterial qualities that support cleaner air. It also draws moisture into the airways so you clear congestion more comfortably. These effects make the cave an excellent addition to your daily self care routine.
You do not need a commercial facility to enjoy these advantages. A thoughtful do it yourself version delivers similar benefits when you focus on quality materials and proper airflow. The next sections show you exactly how to make it happen step by step.
The Science Behind Salt Therapy Benefits
Scientific interest in salt therapy keeps growing because early results look encouraging. Studies highlight improvements in breathing for people with ongoing respiratory conditions. Participants often note better sleep and higher energy after consistent exposure.
One review of available research points to measurable gains in forced expiratory volume and overall lung capacity. People with asthma or allergies sometimes experience fewer symptoms when they add halotherapy as a supportive practice. The antiinflammatory action of salt particles appears to play a key role.
You also support your skin health through these sessions. Salt helps balance moisture and reduces redness for conditions such as eczema or psoriasis. The calm atmosphere further lowers cortisol so you feel more centered after each visit.
These benefits build over time when you use your cave regularly. You will notice small changes first such as clearer sinuses or softer skin. Later you may enjoy deeper relaxation and stronger immunity as your body adapts. The evidence encourages you to try this natural method with realistic expectations and steady commitment.
Why Build A DIY Himalayan Salt Cave In Your Home
Busy schedules leave little room for regular spa visits. Creating your own cave solves that problem by bringing wellness directly to you. You save travel time and gain privacy whenever you need a break.
Your family benefits too. Children and adults alike can share quiet moments in the space. The setup encourages mindful breathing and gentle conversation that strengthens connections at home.
You control every detail from lighting to temperature. This customization lets you match the environment to your exact needs on any given day. Some mornings you want brighter light while evenings call for softer glows.
Long term you invest in your health without depending on outside appointments. The cave becomes a reliable tool for stress management and respiratory support throughout the year. You feel empowered knowing you built something that truly serves your lifestyle.
Essential Materials For Your DIY Himalayan Salt Cave Home Spa
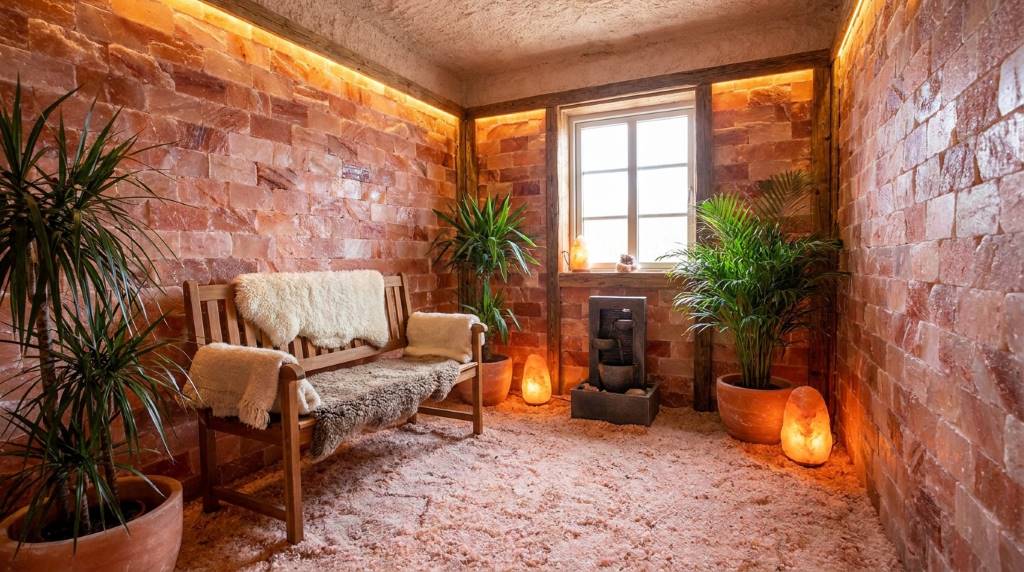
You begin with premium Himalayan salt bricks because they release negative ions and create the signature pink glow. These bricks form the foundation of your walls and deliver both beauty and function.
Loose Himalayan salt crystals cover the floor and add extra texture underfoot. The granules release trace minerals into the air during your sessions. You can refresh the layer whenever it looks worn.
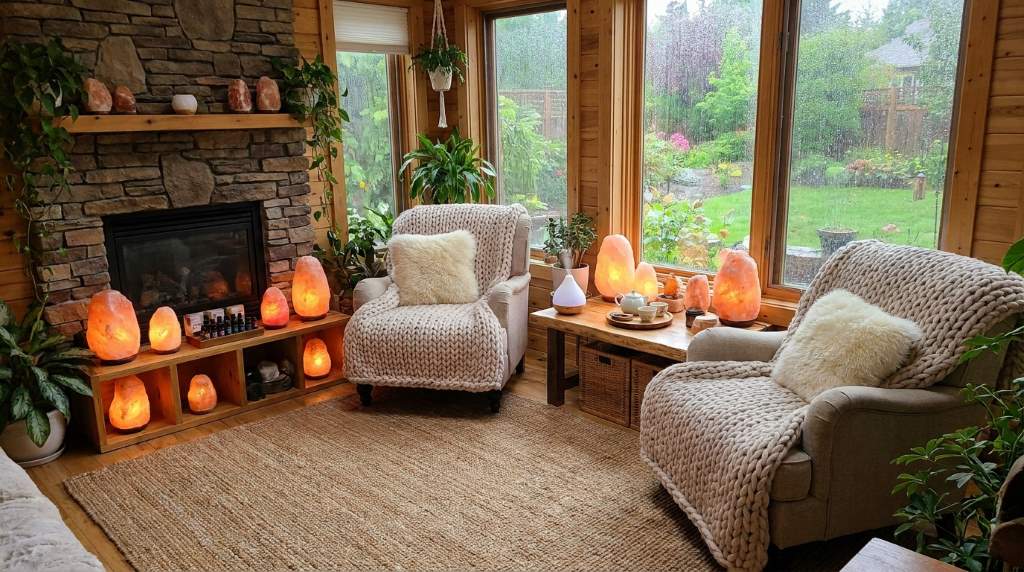
Salt lamps provide the main lighting source. Their warm hue mimics natural cave conditions and supports a peaceful mood. Place several lamps at different heights for even illumination.
You also need non corrosive seating such as wooden benches or specially treated chairs. Cushions made from natural fibers add comfort without reacting to the salt environment. A small fan or ventilation system keeps air moving so the space stays fresh.
Finally you gather simple tools for installation. Adhesive designed for salt surfaces holds the bricks securely. A level and measuring tape ensure straight lines and a professional finish. With these items ready you move confidently into the building phase.
Complete Guide To Building Your Do It Yourself Himalayan Salt Cave Home Spa
You start by selecting a suitable space such as a spare closet a corner of the bathroom or a small unused room. Good ventilation matters so choose an area with an existing window or air vent. Measure the space carefully before you buy materials.
Next you prepare the surfaces. Clean the walls and floor thoroughly to remove dust and grease. Apply a moisture barrier if the room tends to feel damp. This step protects the structure and keeps your cave dry.
You install the salt bricks row by row beginning at the bottom. Use the recommended adhesive and press each brick firmly into place. Check alignment with a level after every few pieces. Work slowly to avoid gaps or uneven sections.
For the floor you spread a thick layer of loose crystals across the entire area. This creates a soft walking surface and enhances the therapeutic effect. Add a narrow path of flat tiles if you prefer easier cleaning in high traffic spots.
Finally you position the lamps and seating. Hang or place lamps so they highlight the salt texture without creating harsh shadows. Arrange furniture so you can sit or lie back comfortably. Test the airflow and make small adjustments until the room feels just right.
You complete the project in a weekend when you follow this sequence. The result feels like a professional spa yet carries your personal touch. Take time to admire your work before you enjoy the first session.
Tips To Enhance The Spa Experience In Your Salt Cave
You set the mood with soft background sounds such as gentle ocean waves or light instrumental music. These audio choices deepen relaxation and help you forget outside distractions.
Aromatherapy blends well with the salt environment when you choose compatible essential oils. Lavender or eucalyptus support breathing while keeping the focus on the salt particles. Use a diffuser on low so the scents remain subtle.
You add personal elements like a favorite throw blanket or small plants that tolerate the dry air. These touches make the space feel uniquely yours and encourage regular use.
Temperature control matters too. Keep the room comfortably warm around seventy degrees Fahrenheit so your body stays relaxed. A small heater or fan lets you adjust quickly based on the season.
Regularly rotate the seating positions to change your view of the glowing walls. This simple habit keeps each visit feeling fresh and interesting. You will look forward to your time in the cave even more.
How To Use Your DIY Himalayan Salt Cave For Optimal Results
You enter the space after a warm shower so your skin and airways open naturally. Sit or recline in a comfortable position and focus on slow deep breaths. Inhale through the nose and exhale through the mouth for best results.
Stay inside for twenty to forty minutes per session. Beginners start shorter and gradually increase time as they grow accustomed to the environment. Consistency brings better outcomes than occasional long visits.
You can read meditate or simply rest during the session. Many people journal their thoughts because the calm setting sparks clear thinking. Others close their eyes and practice gratitude or visualization.
Drink plenty of water afterward to help your body flush any loosened mucus. Gentle movement like a short walk supports circulation and maximizes the respiratory benefits.
Track your sessions in a simple notebook. Note how you feel before and after so you notice patterns over weeks. Adjust frequency based on your energy levels and health goals. Most people enjoy three to five sessions each week for steady improvement.
Safety Considerations and Best Practices
You keep the cave clean by vacuuming loose salt weekly and wiping surfaces with a dry cloth. This habit prevents dust buildup and maintains a hygienic atmosphere.
Monitor humidity levels because excessive moisture can affect the salt bricks. A small dehumidifier helps in damp climates common in many parts of the United States.
Consult your doctor before you begin if you have severe respiratory conditions or other health concerns. Most people tolerate the environment well yet individual needs vary.
You avoid eating or drinking inside the cave to protect the materials. Children should always have adult supervision during visits. These simple rules keep the space safe and enjoyable for everyone in your household.
Maintaining Your Home Salt Cave Spa
You inspect the brick walls monthly for any loose pieces and reattach them promptly. This quick check preserves the structure and appearance.
Refresh the floor crystals every few months or whenever they look compacted. New granules restore the soft texture and continue releasing beneficial minerals.
Clean the lamps regularly with a dry brush to keep their glow bright and even. Dust reduces the ion output so consistent care matters.
You ventilate the room after each use to circulate fresh air and prevent stuffiness. Open a window briefly or run the fan for ten minutes.
These easy maintenance steps extend the life of your cave and keep the experience pleasant. You spend only a few minutes each week yet enjoy years of reliable wellness support.
Conclusion
You now hold a complete roadmap for building and enjoying your own Himalayan salt cave at home. From choosing materials to daily use and maintenance every detail supports better breathing clearer skin and deeper relaxation. The 2022 research review confirms that halotherapy offers measurable improvements in lung function and quality of life when practiced thoughtfully.
Take the first step today by measuring a small corner of your house and gathering a few salt bricks. You will soon discover how this personal sanctuary lifts your mood and strengthens your wellbeing.
Start small stay consistent and watch your health and happiness grow. Your DIY Himalayan salt cave home spa awaits. Create it enjoy it and share the calm with those you love. Finally, we recommended the best facials in midtown Manhattan and the best manicure in midtown Manhattan to know more details.