How to Use Square Backdrop Stand in Photography?
Square backdrop stands are an essential photography accessory for creating crisp, clean backdrops in portrait sessions and product photoshoots. With some strategic tips and techniques, you can master square backdrop stands to elevate your images. This comprehensive guide covers everything you need to know, from choosing the right stand and backdrops to positioning subjects and lighting.
Selecting a Square Backdrop Stand
The first step is picking out the right square backdrop stand for your needs. Here are the key factors to consider:
Types of Stands
There are two main types of square backdrop stands:
- Collapsible stands – These are portable squares that fold down into a compact size for easy transport and storage. They come in a range of dimensions from 2×2 feet up to 10×10 feet. Collapsible stands are lightweight and easy to set up.
- Fixed stands – As the name suggests, these are permanently fixed in the open position. They are heavier and more difficult to move but provide excellent stability. Fixed stands are ideal for permanent home photography studios.
Dimensions
Think about what size backgrounds you want to use – common options include 4×4 ft, 5×5 ft, 6×6 ft, 8×8 ft, and 10×10 ft. Make sure to get a stand that matches or exceeds the backdrop size you need. Bigger is usually better for maximum flexibility.
Adjustable Height
Stands that allow you to adjust the height of the top crossbar give you more options for positioning your backdrop. Look for height adjustments between 6-10 feet.
Support and Stability
Make sure the stand feels sturdy and stable when fully extended. It should be able to support the weight of your backdrops without wobbling or shaking. Stands with angled side legs offer more support than straight up-and-down legs.
Portability
If you want to transport your stand between locations, look for one with folding legs and lightweight materials like aluminum. Wheels can also help with moving collapsible stands.
Budget
Square backdrop stands range from $50 for basic collapsible models up to $500+ for heavy-duty fixed stands. Set a budget before shopping so you can narrow down your options.
Choosing Backdrops
Once you’ve selected your stand, the next step is to pick out appropriate backdrops. Here are some options to consider:
Muslin
Muslin is a lightweight woven cotton fabric that works beautifully for photography backdrops. It’s affordable, can be easily draped over stands, and comes in endless colors/patterns. The lightweight drape creates appealing soft folds and ripples.
Paper
For a crisp, clean look, paper backdrops are great for product and portrait shoots. Rolls of background paper can be continuously unfurled to provide a pristine surface. Use thick, high-quality paper to avoid tearing or wrinkles.
Vinyl
Vinyl is a matte plastic backdrop material that’s waterproof and easy to clean. It has a smooth, seamless appearance suitable for high-key commercial shots. Vinyl rolls up for compact storage and can be wiped down between uses.
Seamless
Seamless paper or muslin backdrops feature a continuous roll designed to eliminate seams where separate backdrop sections meet. This creates a flawless backdrop when properly mounted. Seamless materials work great for floor-length portrait shots.
Green Screen
Green screen backdrops allow you to digitally insert any background in post-production using chroma key compositing techniques. Use high-key green fabric stretched evenly across the stand. Wrinkles can cause issues with removing the green screen color.
Consider colors, patterns, and materials to complement your photography subjects and goals. Solid neutrals are the most versatile options.
Setting Up the Stand
Once you choose your backdrop stand and materials, it’s time to put them together for shooting. Follow these tips for proper set up:
Assemble Stand
For collapsible stands, extend legs fully and lock any clamps into place. Raise top crossbar to desired height and tighten. Make sure stand is level and stable. Fixed stands can be left assembled.
Attach Backdrop
Use clamps or clips to securely attach backdrop material to top crossbar. For seamless rolls, use a spring-loaded pole system that keeps the paper taut. Let extra material drape down or splay it out evenly along floor.
Remove Creases
Carefully remove any creases, wrinkles or folds in backdrop with your hands. For fabric, use a garment/fabric steamer if needed. Wrinkles cause unwanted shadows and lines.
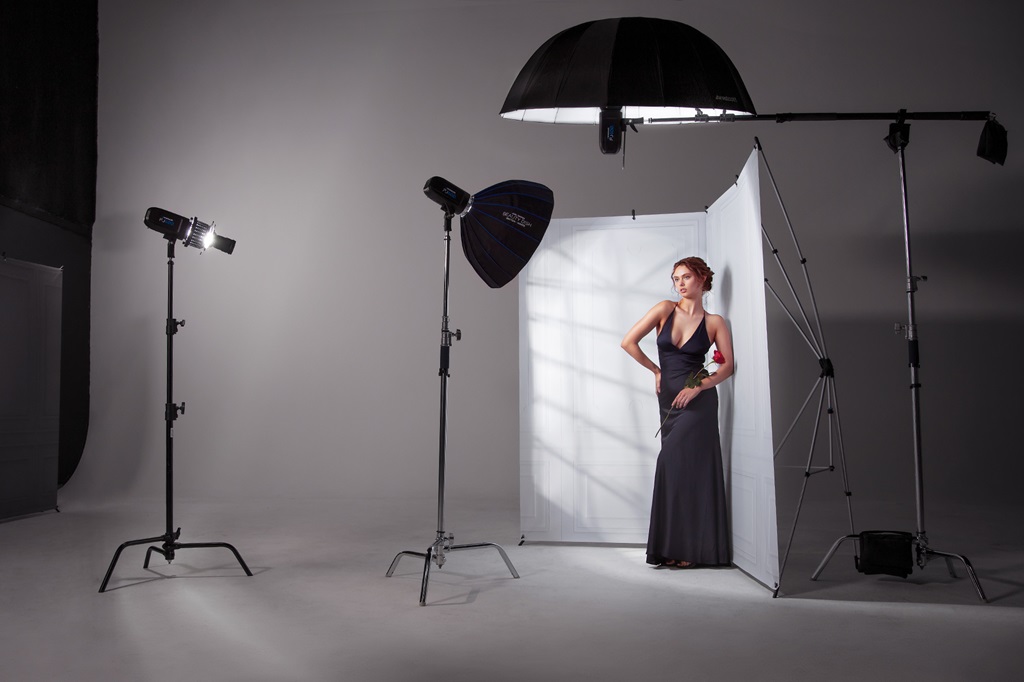
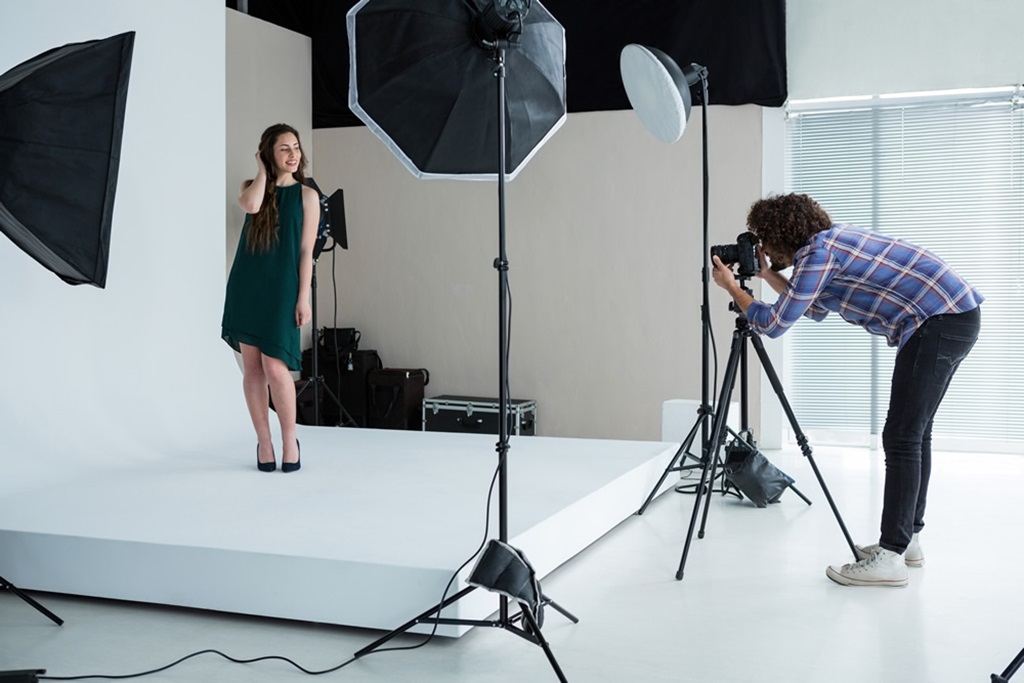
Position Lights
Position lighting in front aiming towards the backdrop to provide even illumination. This prevents dark shadows or bright highlights on the background.
Consider Entire Area
Check the full visible area behind your subject extending beyond the backdrop. Remove any distracting objects and fill the surrounding space evenly.
With the stand, backdrop, and lights in place, you’re now ready start photographing. Follow these tips for taking great shots:
Positioning Subjects
Proper positioning is key to getting professional results with square backdrop stands.
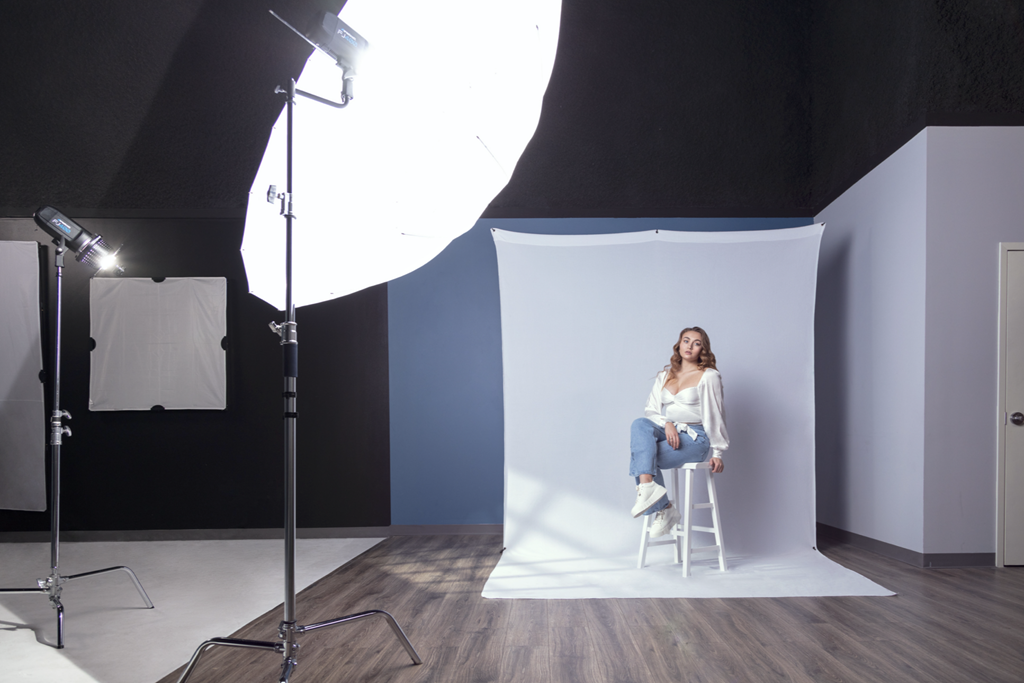
Distance from Backdrop
Place subjects at least 2-3 feet in front of the backdrop to avoid shadows. More distance creates a cleaner background. Zooming in can simulate less space if needed.
Subject Centering
Position the subject in the middle of the frame to showcase the crisp square backdrop. Re-center as needed if subject moves. Watch edges to avoid showing backdrop poles.
Backdrop Wrinkles
Any tiny wrinkles or folds in the backdrop will be highlighted behind the subject. Periodically check for new wrinkles and steam or adjust backdrop as required.
Creative Angles
Get low or elevate your camera angle to include more of the backdrop for added context. Simple head-on shots can be a bit boring.
Fill Entire Background
Zoom out or move subject closer to fill the entire visible background area with their body. This maximizes the clean backdrop effect.
With some small adjustments to subject positioning, you can get drastically different results. Experiment to find what works best for each particular shoot.
Using Lighting Effectively
Proper lighting is crucial for getting a bright, evenly lit backdrop without shadows:
Meter Exposure
Use a light meter to properly expose the backdrop first before adding subject. The backdrop should have no large bright or dark areas.
Highlights vs Shadows
Place lights at 45 degree angles to avoid hot spots or shadows. Feather lights for subtle gradients if desired.
Light Falloff
Make sure lights are close enough to provide even illumination across the entire backdrop area. Edges can be slightly darker but shouldn’t be drastic.
Subject vs Backdrop
Use ratio lighting techniques to control the contrast between subject and backdrop. Generally the backdrop is 1-2 stops darker than subject.
Reflectors & Flags
Utilize reflectors to bounce light into shadows areas if needed. Small flags can help prevent light spilling from your subject onto the backdrop.
Background Lights
Place small background lights on stands aimed directly at the upper corners of the backdrop for extra illumination of this area.
Pay attention to both the backdrop lighting as well as the subject lighting to beautifully balance exposures.
Post-Production Touch-ups
Even with proper setup and shooting techniques, some minor post-production tweaks can help perfect your images:
Distracting Elements
Use the clone stamp or healing tool to remove any distracting objects like cords, stands or walls that got captured in the shot.
Backdrop Imperfections
Subtly blur or clone out any small wrinkles, folds or tears that are visible in the backdrop.
Brightness/Contrast
Make quick overall adjustments to the brightness, contrast and color balance to make the backdrop white/gray perfectly neutral if needed.
Vignette
Add a subtle vignette to draw attention towards the center subject and away from the backdrop edges and poles.
Cropping
If the backdrop isn’t perfectly filled in, crop images to hide poles and maximize clean background area around the subject.
With just a few quick retouches, you can fix minor technical issues in an image and make your shots look professionally polished.
Conclusion
Achieving professional results with square backdrop stands comes down to choosing suitable equipment, carefully positioning your subjects, lighting the scene effectively, and perfecting details in post-production. With practice setting up and taking shots using square stands, you’ll be able to produce product and portrait photos with an elegant, seamless background. Pay close attention to eliminating wrinkles, positioning subjects to avoid shadows, and lighting the backdrop evenly from edge to edge. And don’t forget small refinements in post to remove any last distractions. With the tips in this guide, you’ll master using square backdrop stands to elevate the quality of your images.
Frequently Asked Questions
- What size square backdrop stand should I purchase?
This depends on the sizes of backdrops you want to use, but an 8×8 or 10×10 stand provides maximum flexibility for full body portraits with most common backdrop sizes. Adjustable height stands between 6-10 feet are also most versatile.
- How do I prevent backdrop shadows behind subjects?
Place subjects at least 2-3 feet in front of the backdrop and use front lighting angled at 45 degrees towards the backdrop. Using hair/rim lights can also help separate the subject from the background.
- What’s an affordable backdrop material good for beginners?
Muslin is a great starter backdrop choice. It’s lightweight, affordable, and available in tons of colors and patterns. The soft drape provides a flattering effect for portraits.
- Can I use square backdrop stands outside?
Yes, square stands can be used outside but require sandbags or weights to prevent tipping over in windy conditions. Outdoors also makes lighting trickier and introduces issues like weather and bugs.
- Is post-processing needed for shots using backdrop stands?
Some minor retouching like removing distractions, fixing backdrop wrinkles and adjusting color can take images to the next level. But a properly set up stand shot shouldn’t require heavy editing.